Running Keycloak Locally
ជំពូកនេះមិនទាន់ត្រូវបានបកប្រែជាភាសាខ្មែរនៅឡើយទេ — សូមអានជាភាសាអង់គ្លេសខាងក្រោម។
Table of Contents
- What You Need
- Run Keycloak with Docker
- Open the Admin Console
- Tour of the Admin Console
- Create Our First Realm
- Master Realm vs Application Realm
- Beginner Pitfalls
We use Docker so this is reproducible on any machine — no manual Java or Keycloak install.
1. What You Need
- Docker (Docker Desktop, or the Docker Engine on Linux) —
docker --versionto check - Nothing else. Keycloak's own container ships everything it needs to run in development mode.
2. Run Keycloak with Docker
docker run --name keycloak \
  -p 8080:8080 \
  -e KC_BOOTSTRAP_ADMIN_USERNAME=admin \
  -e KC_BOOTSTRAP_ADMIN_PASSWORD=admin \
  quay.io/keycloak/keycloak:26.7.0 \
  start-dev
start-devruns Keycloak in development mode — an embedded database, relaxed HTTPS requirements, and hot-reload-friendly defaults. Never usestart-devfor a production deployment (see Part 8 for what production hardening involves).KC_BOOTSTRAP_ADMIN_USERNAME/KC_BOOTSTRAP_ADMIN_PASSWORDcreate the first admin account the first time the container boots.
Wait for a line like Keycloak … started in … Listening on: http://0.0.0.0:8080
— that's your signal it's ready.
3. Open the Admin Console
Visit http://localhost:8080, click Administration Console, and log
in with the admin / admin credentials from the command above.
4. Tour of the Admin Console
The left sidebar is the whole mental model of Keycloak in one glance:
- Realm selector (top-left) — which realm you're currently managing
- Realm settings — the realm itself: tokens, login policy, themes
- Clients — applications registered against this realm
- Users — accounts inside this realm
- Realm roles — roles available realm-wide
Everything in Part 4 happens inside this sidebar.
5. Create Our First Realm
By default you land in the master realm — don't build inside it (see
§6). Instead:
- Click the realm selector (top-left, shows
master) - Create realm
- Name it
crash-course - Create
You're now managing an isolated realm with zero users or clients — the starting point for Part 4.
6. Master Realm vs Application Realm
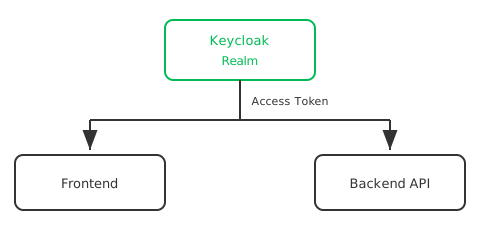
masterrealm — created automatically, used to administer Keycloak itself (manage other realms, server-wide settings). It is not meant to hold your application's users.- Application realm (
crash-course, here) — where your app's actual users, clients, and roles live. Every real project gets its own realm, separate frommaster.
7. Beginner Pitfalls
- Building everything inside
master. It works at first, but mixes your application's users with Keycloak's own administrators — always create a dedicated realm. - Forgetting
-p 8080:8080. Without the port mapping, the container runs butlocalhost:8080connects to nothing. - Using
start-devin production. It's explicitly for local/dev use — production needs a real database, HTTPS, and a hostname configuration, none of whichstart-devsets up for you.
Official docs:
ទិញកាហ្វេជូនខ្ញុំ
ចូលចិត្តមេរៀននេះមែនទេ? សូមពិចារណាទិញកាហ្វេជូនខ្ញុំមួយកែវ ដើម្បីគាំទ្រការបង្កើតមាតិកាឥតគិតថ្លៃបន្ថែមទៀត!